Custom file Meteo Data Conversion procedure |
  
|
Custom file Meteo Data Conversion procedure |
|
(go directly to
our
Notes
on Meteo)
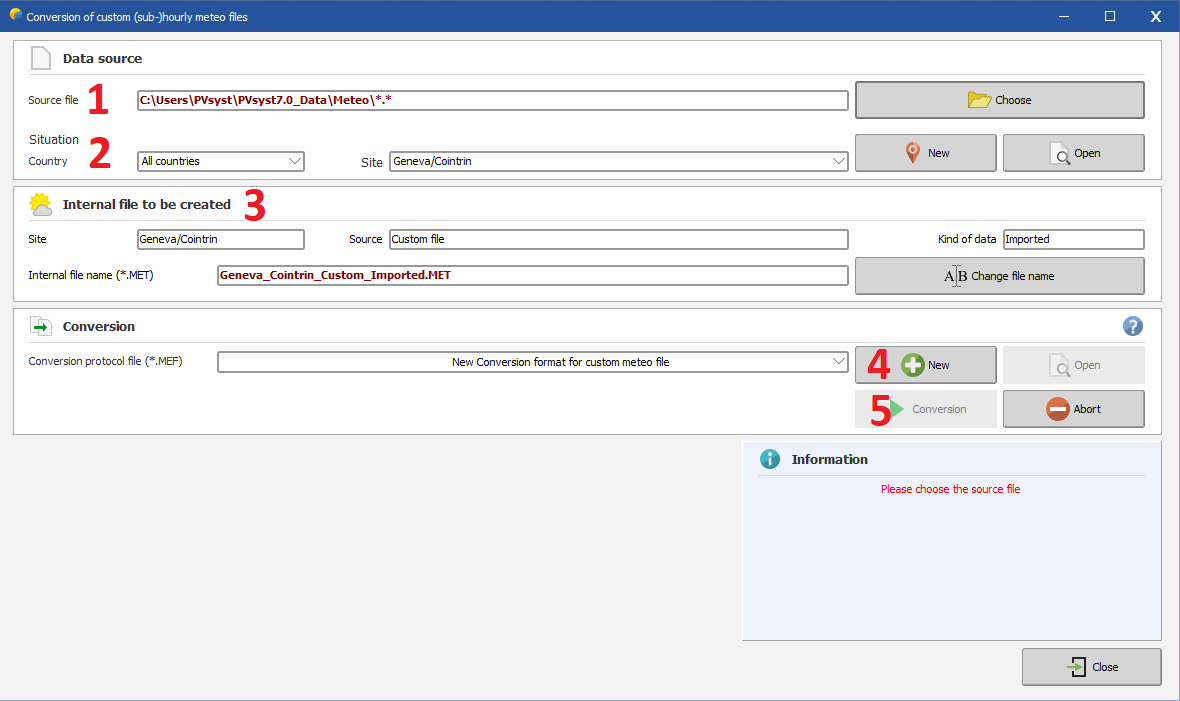
Please follow each step of the conversion dialog:
1.Choose your text/csv source file, which can reside anywhere on your disk.
2.Choose
the geographical site from
the list.
If not available in the database, you have to create a new
site.
Important notice :
When
creating a new site, PVSyst will ask you to define a fallback monthly
meteo data. This fallback meteo data will be used if
important fields are missing in your dataset (temperature for
instance).
Otherwise it
won't be used.
3.Give
a significant name to the
internal file to be created ("modify button").
This will identify the file in the meteo or measured data list
boxes everywhere in PVSyst. By default, PVSyst sets "site_Custom_Imported.MET" as a name.
Please carefully choose this title since you won't be able to
change it after conversion. Note that if you simply want to change
the site name, make your modification directly in the site label.
This will update the *.MET file name accordingly.
4.Choose
or define the Conversion protocol. In some cases
(depending on the chosen protocol), the program will still ask for
the beginning date or the
year.
The column interpretation has been made as reliable as possible,
regarding to all unexpected events which may arise on measured data
files of any kind. For example, if the conversion encounters an
extra comment or unreadable line, it will ask the operator for
skipping it's processing. It also performs global checks (limits,
consistency) on each value.
5.When
ready, press the "Start
Conversion" button.
During the execution, a control executing window displays the
contents of the source-file's line currently being processed, as
well as the actually converted meteo values, which will be
transcribed on the internal destination-file.
6.After conversion, you are advised to check your file with the "Graphs and Tables" tool (either for meteo or for measured data files), and carefully check the time shift of your data.